Air angle grinders are versatile tools that can be used for a variety of projects, from polishing metal to cutting tile. While they are durable tools, they can break down over time and will need to be repaired. This guide will show you how to repair an air-angle grinder.
- Check the air angle grinder for any damage
- If there is any damage, replace it with a new one
- Inspect the air hose for any leaks
- If there are any leaks, repair them with duct tape or a similar product
- Connect the air hose to the air compressor and turn on the compressor
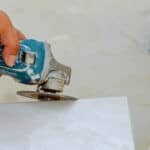
- Hold the air angle grinder in one hand and use the other hand to operate it
- Slowly move the air angle grinder across the surface you wish to grind or sand
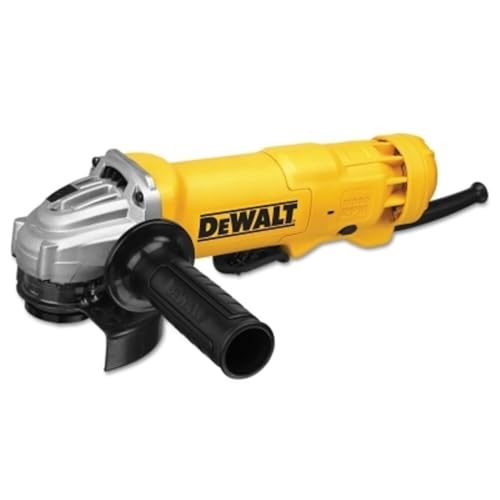
- Next generation 11 amp AC/DC 11,000 rpm motor on the electric grinder...
- Dust Ejection System; provides durability by ejecting damaging dust...
- Over-sized brushes provide 2 times the brush life of the previous...
- Large spiral bevel gear provides long transmission life. One-Touch...
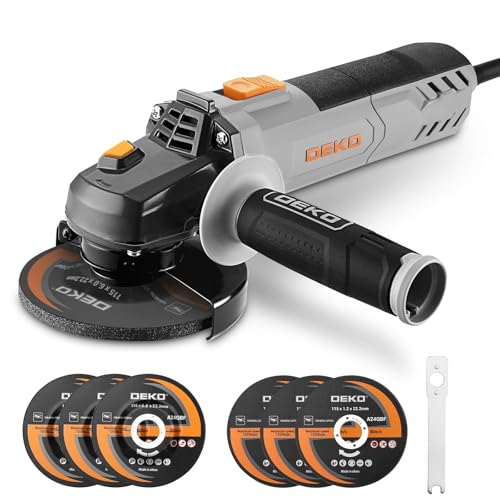
- 【DURABLE 900W ANGLE GRINDER】This angle grinder is a practical...
- 【VERSATILE FOR METAL WORKING】This angle grinder power tool is...
- 【COMPACT DESIGN】This short handled angle grinder offers left and...
- 【MULTIPURPOSE】This manual electric grinder with power ventilation...
- Powerful 6.0 Amp Motor with 11,000 RPM
- Tool-less guard for quick adjustments
- Heavy duty metal gear housing for added ruggedness and durability
- Compact grip design for comfort and control
How to Repair Air Angle Grinder?
What Do You Do When Your Grinder Stops Working?
When your grinder stops working, the first thing you should do is check to see if anything is blocking the blades from spinning. If there is, you’ll need to remove the obstruction and then try powering on the grinder again. If the grinder still won’t turn on, you may need to replace the power cord or contact a professional for further assistance.
How Do You Fix a Grinder That Won’t Turn On?
If your coffee grinder won’t turn on, there are a few things you can do to try and fix it. First, make sure that the power cord is plugged in securely and that the outlet is working. If the problem persists, you may need to replace the power cord.
Another potential issue could be the grinding mechanism itself – if it is jammed or damaged, it may need to be replaced. You can also try troubleshooting the grind settings to see if that is causing the problem. If none of these solutions work, then you may need to contact a coffee grinder repair service.
Why is My Angle Grinder Not Spinning?
If your angle grinder’s motor is running but the wheel isn’t spinning, there are a few possible explanations. The most common reason is that the angle grinder’s brushes have worn out. The brushes are what conduct electricity to the spinning armature in the motor, so if they’re not working, neither will the wheel.
Replacing the brushes is relatively simple and can be done with just a screwdriver; consult your angle grinder’s manual for specific instructions. Another possibility is that there is something jammed in the angle grinder’s gearing. This can happen if you force the tool to grind through something it shouldn’t, like metal that’s too thick or nails.
If this is the case, you’ll need to disassemble the angle grinder to remove the debris; again, consult your manual for specific instructions. Finally, it’s also possible that your angle grinder’s motor has burned out. This usually happens as a result of overloading the tool or using it for extended periods without giving it a break; unfortunately, it often means that you’ll need to replace the entire unit.
Can Grinder Be Repaired?
Assuming you are referring to a coffee grinder, the answer is generally yes. Most coffee grinders have removable burrs that can be replaced relatively easily. If your grinder is not working properly, it is likely due to the burrs becoming dull or clogged and will need to be replaced.
Replacing the burrs is usually a fairly straightforward process and can be done at home with just a few tools.
Air Die Grinder Adjustment
An air dies grinder is a very versatile tool that can be used for a variety of different applications. One of the most common uses for an air die grinder is to grind down metal. This can be done by simply attaching a grinding wheel to the end of the die grinder and then turning it on.
The air dies grinder will spin the wheel and grind down the metal quickly and easily. One thing that you may need to adjust on your air die grinder is the speed at which it spins the grinding wheel. This is important because you don’t want to damage the material you’re working on or overheat the tool itself.
To adjust the speed, simply turn the knob located near the trigger. The higher you turn it, the faster the air die grinder will spin. It’s also important to make sure that your air dies grinder has enough power for whatever material you’re working with.
If it doesn’t have enough power, then it won’t be able to grind down anything thicker than what it’s designed for. To check this, look at how much airflow your compressor is providing and compare it to what’s required by your specific air die grinder model.
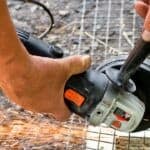
How to Take Apart a Pneumatic Die Grinder
Taking apart a pneumatic die grinder is not difficult, but it is important to follow the proper steps to ensure that the tool is reassembled correctly.
To begin, remove the air hose from the die grinder. Next, unscrew the cap on the back of the housing and remove it.
Inside, you will see the motor assembly. Unscrew the two screws holding the motor in place and lift it out.
Now you can access the inner workings of the die grinder.
Be sure to pay attention to how everything is positioned so that you can put it back together properly. To clean or replace parts, simply follow these steps in reverse order.
How to Repair a Die Grinder
A die grinder is a handheld power tool used for grinding, sanding, honing, polishing, or machining material. Die grinders exist in two main varieties: electric and pneumatic. Pneumatic die grinders are used more often than their electric counterparts because they’re less expensive and easier to maintain.
Electric models are better suited for use with abrasive materials. No matter which type of die grinder you have, the basic principles of repair are the same. With a few simple tools and supplies, you can get your die grinder running like new again in no time!
If your die grinder is having trouble starting up, the first thing to check is the air filter. A clogged air filter will prevent enough air from reaching the motor, causing it to overheat and shut down. To clean the air filter, simply remove it from the housing and wash it with soap and water.
Once it’s dry, put it back in place and try starting up your die grinder again. If your die grinder starts but quickly stalls out, there may be an issue with the carburetor. Over time, dirt and debris can build up inside the carburetor and prevent proper airflow.
To clean the carburetor, you’ll need to disassemble the housing (be sure to unplug the power cord first!). Once you have access to the carburetor itself, use a small brush to gently remove any buildup before putting everything back together again. Another common issue with die grinders is a damaged or worn-out chuck key.
The chuck key is used to tighten or loosen the jaws of the chuck (the part of the tool that holds onto drill bits), so if it’s not working properly then neither will your chuck! Inspect your chuck key for damage such as bent teeth or a broken handle; if it looks damaged in any way then it needs to be replaced before you can continue using your die grinder. You can find replacement chuck keys at most hardware stores or online retailers that sell Power Tools.
Once you’ve addressed all of these potential issues, try starting up your die grinder again. With any luck, following these steps should get things running smoothly once more.
Die Grinder Just Blowing Air
If you’ve ever used a die grinder, you know that they can be incredibly powerful tools. But what happens when your die grinder starts blowing air instead of grinding? There are a few possible causes for this problem.
First, check to make sure that the air supply to the die grinder is turned on and that there is enough pressure. If the pressure is too low, the tool will start to blow air. Another possibility is that the collet (the part of the tool that holds the grinding bit) isn’t tight enough.
If this is the case, simply tighten it up and see if that fixes the problem. Finally, there may be something wrong with the motor itself. If this is the case, you’ll need to take it to a professional for service or replacement.
Don’t let a blown die grinder ruin your day – troubleshoot it quickly so you can get back to work!
Air Grinder Has No Power
If your air grinder has lost power, there are a few possible explanations. The most likely culprit is a loss of compressed air. This can be due to a variety of reasons, such as a loose connection or a problem with the compressor itself.
Another possibility is that the air grinder’s motor has burned out. This is less common, but it can happen if the grinder is overloaded or if it isn’t properly ventilated. Finally, there may be something wrong with the electrical supply to the grinder.
This could be a tripped breaker or a blown fuse. If you’re not sure what the problem is, call an electrician for help troubleshooting.
Central Pneumatic Air Angle Die Grinder
If you’re looking for a powerful and versatile air angle die grinder, then you’ll want to check out the Central Pneumatic air angle die grinder. This tool is perfect for grinding, polishing, and deburring a variety of materials. The Central Pneumatic air angle dies grinder has a compact and lightweight design that makes it easy to maneuver and use in tight spaces.
It also features a variable speed trigger that allows you to control the speed of the tool for precise results. The ergonomic handle helps reduce fatigue during extended use. This air-angle die grinder comes with a 1/4-inch collet that accepts most standard grinding bits.
It also includes an adjustable guard to help keep your hands safe while in use.
Central Pneumatic Die Grinder Adjustment
If you’re looking for a die grinder that you can adjust to suit your needs, then the Central Pneumatic die a grinder is a great option. This die grinder has an adjustable speed control knob, so you can control how fast or slow the grinding wheel spins. There’s also an adjustable stop collar, which allows you to set the depth of the grind.
And finally, the angle of the handle can be adjusted to give you more comfort and control while using this tool.
Central Pneumatic Die Grinder Not Spinning
If your central pneumatic die grinder is not spinning, there are a few things you can do to try and fix the issue. First, make sure that the power switch is in the “on” position. If it is, then check to see if the grinder’s motor is getting power by checking the voltage at the motor terminals with a voltmeter.
If there is no power going to the motor, then you will need to replace the power cord. If there is power going to the motor, but it still isn’t running, then the problem may be with the brushes or bearings inside of the motor. To access these parts, you will need to open up the housing of the grinder.
Once you have access to these parts, inspect them for wear and tear. If they look worn out, then they will need to be replaced.
Conclusion
If your air angle grinder has stopped working, there are a few things you can do to try and repair it. First, check the electrical cord and make sure it is plugged in properly. Next, check the air compressor to ensure that it is turned on and functioning properly.
Finally, inspect the air angle grinder itself for any damage or debris that may be causing it to malfunction. If you are unable to identify the problem, or if the grinder still does not work after following these steps, you may need to take it to a professional for repairs.

Hi, this is Cynthia A. Rose. Welcome to my Grinder related blog. Usually, I am busy with my kitchen and cooking all day. My main desire is to create a new recipe every day. But I have to use new tools every day to create new recipes. In this blog, I will share you how to use kitchen tools properly. I will not just share cooking related equipment, I will try to review all kinds of grinders like angle grinder among you. I hope my 12 years of experience will come in handy. Thanks!