Skip to content
Do you want your meat grinder to last for a long time? If yes, then take immediate action. Meat grinders require regular cleaning since there are several crannies and nooks, which may create space for bacteria. Therefore, you need to learn how to clean a meat grinder thoroughly so that you can prevent your family and other visitors from any risk of getting sick.
In this article, we will guide you on how to carry proper cleaning of your grinder as well as how you need to maintain and store it correctly for future use in chopping your meat. See below.
Steps for cleaning your meat grinder
Let us look at the step-by-step process involved when you are cleaning a meat grinder.
(1) Clean your meat grinder immediately after use
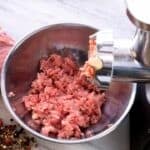
You should be aware that while grinding, the meat may leave some grease and oil behind when it passes via the grinder. With time, this makes it dry and crust eventually. Therefore, you need to start the process of cleaning once you are through to avoid the accumulation of such problems.
(2) Feed bread into the grinder
Usually, grease is one of the by-products as a result of meat grinding. Therefore, to remove them partially or entirely from your grinder, you need to feed the mill with pieces of bread via the device. These pieces of bread are capable of absorbing the grease from the inside, which tremendously enables you to clean the machine less easily. Make sure to feed the bread first before dissembling the machine.
(3) Disassemble the meat grinder
Once you have removed grease from your grinder, you can go ahead to remove some parts of the meat grinder. It is a straightforward process that involves first unplugging the machine if it is electric. Next, break it down into some parts. However, usually, this one depends on the model and the type of grinder.
Generally, the meat grinder consists of the following parts;
- the screw, which is an internal part that makes the meat move through the grinder.
- Blade for cutting and chopping of the meat.
- Cover, which mainly plate and blade.
- Die or plate, which is a metal with holes in which the meat exits.
- The hopper, Feed tube, pusher, is a single part where meat is put into the grinder.
(4) Allow some parts to soak into water
Get a small bucket and pour some warm water into it with any detergent that you may get for cleaning the dishes. Next, select the entire grinder which you had disassembled previously and immediately put them into the bucket filled with the detergent and warm water.
Notably, no need to wash some of these parts but allows them to settle around for some time in the water until some small particles and grease sticking to the parts of the machine come out ultimately. However, if you are using an electric grinder, you should not soak any motorized parts. Instead, you can wipe down the outer base using a damp cloth so that you can dry it.
(5) Scrub the disassembled parts
Next, you can use a sponge when cleaning the cover, blade, and screw. However, you must be very keen, especially when cleaning the blade of the grinder because they are very sharp, which might cut your hands when handled carelessly. For you to clean the interior part of the hopper, feed tube, and the holes of the plate, you can switch to the bottle brush easily.
Once you are through with scrubbing, ensure to rinse every part using clean water. It would help if you did not hurry through this process since you need to remove all the traces altogether to prevent bacteria from breeding germs. Besides, you can scrub the parts more and more.
(6) Allow the disassembled parts to dry completely
You can wipe down the disassembled parts of the grinder when you have finished washing them, but make sure that you should not hurry in putting the machine back together instead;, you can grab all the parts and put them on the rack of the wire for them to dry completely. Allow them to dry enough until you are unable to observe any traces of water.
Once you are through with cleaning, you need to store your machine correctly. So let us see how to achieve this.
How to store your meat grinder properly
(1) Lubricate some parts of your meat grinder
Take some spray bottles and oil minerals from your store. Using your spray bottle, pour some oil into it and immediately start spraying all the parts of the machine, which is non-electric metals. This will help in discouraging and removing any rust that may build up, mainly when the device stays for an extended period without use.
(2) Store some parts of the grinder each to a separate bag
You can comfortably store the parts separately in an individual case once oiled and cleaned up thoroughly. Separate storage protects the parts of your grinder from any unnecessary damages that might occur. Besides, you can fill the bags with some rice that can absorb any available leftover content of the moisture.
(3) Ensure to keep the parts of the grinder in a freezing environment
Generally, for proper storage of your meat grinder, remember to put the disassembled parts in a cool place like in a freezer. Usually, cold surrounding improves the performance of every part of the meat grinder significantly. However, when you have limited storage in your fridge, you can keep some parts in a dry spot at your house.
What Do You Need to Do for More Natural Cleaning of the Meat Grinder in Future
For you to clean your grinder easily in the future, you can follow the following three steps.
- Grind only the cold cuts of meat
You should note that when you cut your meat at room temperature, the meat leaves the grinder with some messes. Therefore, ensure to freeze the cut of your meat first before grinding them up for easy future cleaning.
- Before grinding, ensure to remove the sinew from meat first
When you are eating meat, sinew may not add any flavor to the meat at all since they clog up quickly on the grinder and makes the blades appear dull with time. Therefore, take your time to remove sinew from the meat before you start the process of grinding.
- Maintain the grinder’s blade
When the interior of your grinder gets messy, then it may results from the blade, especially when it is not sharp enough. Therefore, ensure that the blade is very sharp all the time for easy cutting of the meat in the future.
Conclusion
Cleaning a meat grinder may be hectic and sometimes even time-consuming, especially when you don’t have the proper know-how. However, when you follow our steps on how to clean a meat grinder, you can be sure to get the entire process easy and straightforward, like one plus one. Ensure, therefore, to clean your meat grinder properly, maintain it, and store it in a cool place all the time.

Hi, this is Cynthia A. Rose. Welcome to my Grinder related blog. Usually, I am busy with my kitchen and cooking all day. My main desire is to create a new recipe every day. But I have to use new tools every day to create new recipes. In this blog, I will share you how to use kitchen tools properly. I will not just share cooking related equipment, I will try to review all kinds of grinders like angle grinder among you. I hope my 12 years of experience will come in handy. Thanks!